 Bitcoin Staking onboarding docs
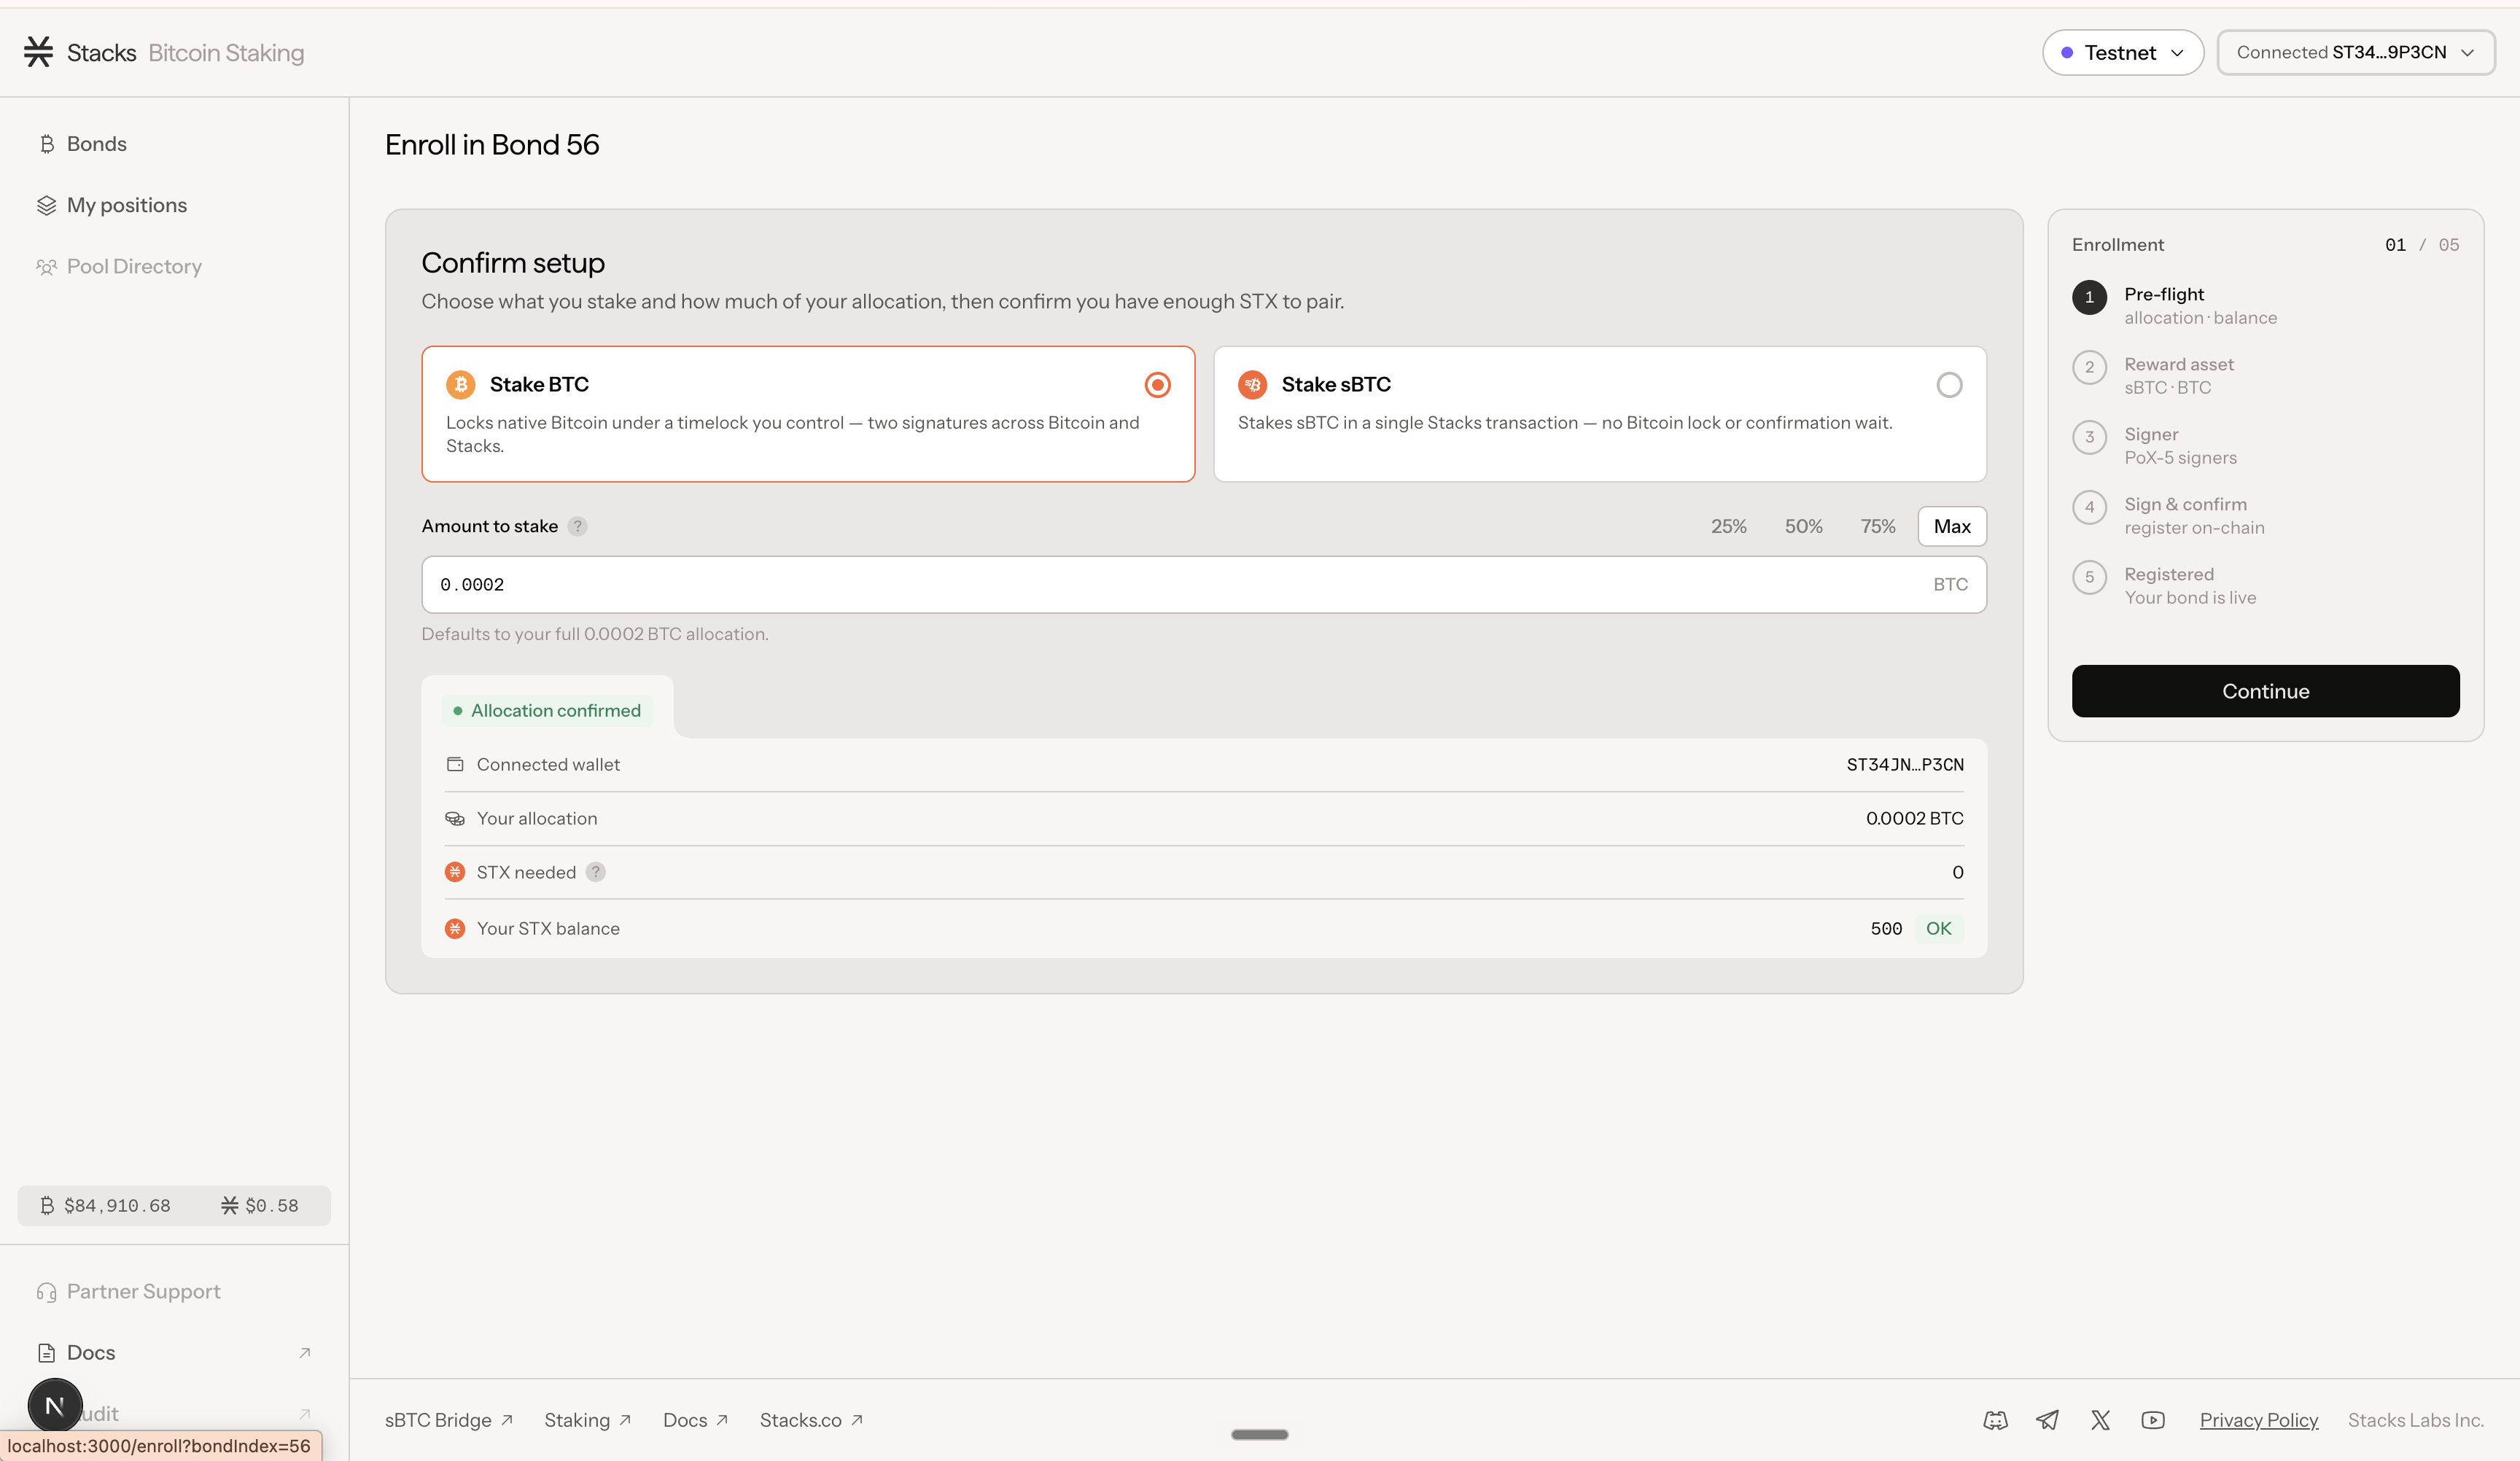
01 / 05 · Prepare and connect
Get the vault accounts ready for enrollment.
Who: the coordinator. The required vault members should remain available with their Ledger devices for the approval steps later.
This step confirms your approved values, funds both vault accounts, and connects the correct accounts to the Bitcoin Staking app.
Before you begin
- You have received your Enrollment Record from the Stacks Endowment. It shows the approved bond, amounts, reward asset, and signer-manager.
- The Stacks vault account is confirmed as whitelisted for this bond.
- Every member required by the Bitcoin or Stacks threshold is available with their Ledger device.
- Your Stacks Endowment contact is available during the enrollment session.
Make sure both vault accounts have enough funds
- In Leather, open the named Bitcoin vault account. Its balance must cover the approved BTC amount shown in the Enrollment Record, plus the Bitcoin network fee.
- Open the named Stacks vault account. Its balance must cover the STX requirement shown in the Enrollment Record, plus the Stacks transaction fee.
- If either balance is too low, send BTC to the complete Bitcoin vault account address or STX to the complete Stacks vault account address. Wait for the deposit to confirm before continuing.
Connect to Bitcoin Staking
- In Leather, select the named Bitcoin vault account.
- Open staking.stacks.co, select Connect Wallet, and confirm the app shows Mainnet.
- Confirm the complete connected Bitcoin and Stacks account addresses exactly match the addresses in the Enrollment Record. If either address does not match, stop and reconnect the correct vault accounts.
- Select Enroll for the bond listed in the Enrollment Record.
- Select Stake BTC and enter your desired BTC amount. The default amount is the maximum enrollment authorized for your connected Stacks account.
- Confirm that the displayed STX requirement matches the Enrollment Record, then select Continue.
02 / 05 · Reward asset
Choose how you will receive rewards.
Who: the coordinator. The reward asset is the asset in which this bond's rewards will be paid.
The choice was made before this session and appears in the Enrollment Record.
- Select the reward asset listed in the Enrollment Record.
- Read the payout explanation shown beneath the selected asset.
- Stop if the available choice or payout explanation differs from the Enrollment Record.
- Select Continue.
03 / 05 · Signer-manager
Confirm your approved signer-manager.
Who: the coordinator. A signer-manager is a smart contract that validates your bond and handles reward distribution. Different signer-managers can have different contract rules, fees, payout processes, and administrative controls.
Use the signer-manager approved for your bond in the Enrollment Record.
- Review the signer-managers available for the bond.
- Select the signer-manager listed in the Enrollment Record.
- Confirm its full contract address, commission, and payout terms against your Stacks Endowment agreement.
- If anything is different or unclear, contact your Stacks Endowment contact before continuing.
- Select Review & sign.
04 / 05 · Approve and register
Approve the Bitcoin lock and register the bond.
Who: every vault member required by the Bitcoin and Stacks signing thresholds.
This step contains two transactions. The first locks BTC on Bitcoin. After it confirms, the second registers the bond on Stacks.
Review the Bitcoin lock
- Bond number and BTC amount match.
- Network fee is within the approved limit.
- Change returns to the Bitcoin vault account.
- Matures at block matches the Enrollment Record.
- The committed Stacks account is correct.
- The first required member reviews the complete Bitcoin proposal in Leather.
- On the Ledger device, open the Bitcoin app and approve only if the proposal matches the Enrollment Record.
- Each remaining required member opens Leather Multisig, selects Activity, and opens the same proposal.
- Each member reviews the same values and approves on their Ledger device.
- Wait for Leather to show that the signing threshold has been met and the transaction has been broadcast.
- Save the Bitcoin lock transaction ID with your records.
Wait for Bitcoin confirmation
- Keep the Bitcoin Staking app open while it waits for the required Bitcoin confirmation.
- Keep the saved Bitcoin transaction ID available.
- Do not create or approve another Bitcoin lock.
Register on Stacks
- When the app shows that the Bitcoin lock is confirmed, select Confirm your bond.
- Compare the bond number, BTC amount, STX requirement, Bitcoin transaction, signer-manager, and maturity with the Enrollment Record.
- The first required Stacks member opens the Stacks app on their Ledger device and reviews the registration proposal.
- Each remaining required Stacks member opens the same proposal in Leather Multisig and performs the same review.
- Each required member approves the proposal on their Ledger device.
- Save the Stacks registration transaction ID with your records.
05 / 05 · Verify enrollment
Confirm that the bond registration succeeded.
Who: the coordinator. The issued screen means the Stacks transaction was submitted, not that it has succeeded.
Enrollment is complete only after the Stacks registration transaction is confirmed and successful.
- Select View position.
- Confirm that the Stacks registration transaction reports Confirmed and Success.
- Compare the bond number, BTC amount, STX amount, reward asset, signer-manager, and maturity with the Enrollment Record.
- Save the position URL and both enrollment transaction IDs.
- Tell your Stacks Endowment contact that enrollment is complete.
If something goes wrong
The wrong account appears
Stop before signing. Disconnect, select the named vault account in Leather, reconnect, and compare the complete address with the Enrollment Record.
The app says not whitelisted
Compare the complete Stacks vault account address with the written whitelisting confirmation. Contact your Stacks Endowment contact if they match but the allocation is missing.
A multisig approval is missing
Open Leather Multisig Activity and identify the pending member. They should open the same proposal, review it, and approve it on their Ledger device.
The Ledger device cannot connect
Close Ledger Live and other Leather windows. Reconnect the Ledger device, unlock it, open the correct chain app on the device, approve the browser USB prompt, and retry.
Bitcoin is still confirming
Keep the saved Bitcoin transaction ID. Do not replace it or create another lock unless your Stacks Endowment contact explicitly instructs you.
Bitcoin confirmed but Stacks registration is pending or failed
Do not repeat the Bitcoin step. Save both transaction IDs, the bond number, error message, and current block height, then contact your Stacks Endowment contact immediately.